DTF transfers are transforming how designers and print shops bring intricate artwork to fabric, offering a versatile option that blends digital flexibility with traditional textile craft. This technology, also known as direct-to-film printing, enables short runs, vibrant color reproduction, and strong fabric compatibility across cotton, blends, and even performance fabrics. In this guide, you’ll explore the DTF transfer process from initial concept and artwork preparation through to the finished garment, with practical tips to preserve color fidelity and wash durability. Understanding each stage helps optimize the overall DTF transfer workflow, reduce waste, and improve production efficiency by aligning design intent with material behavior. Whether you’re launching a new line or refining an existing operation, mastering these steps makes making DTF transfers more reliable and scalable.
Beyond the core method, this film-based garment decoration approach sits alongside other on-demand printing options as a flexible solution for short runs. Often described as a heat-transfer film process, it uses a white base and CMYK colors to deliver bright, durable artwork on a wide range of fabrics. The workflow includes design preparation, film printing, adhesive powder application, curing, and the final transfer to fabric, with checks to protect color fidelity and durability. If you encounter issues, practical DTF transfer troubleshooting tips focus on registration, powder coverage, and adhesion across different substrate types.
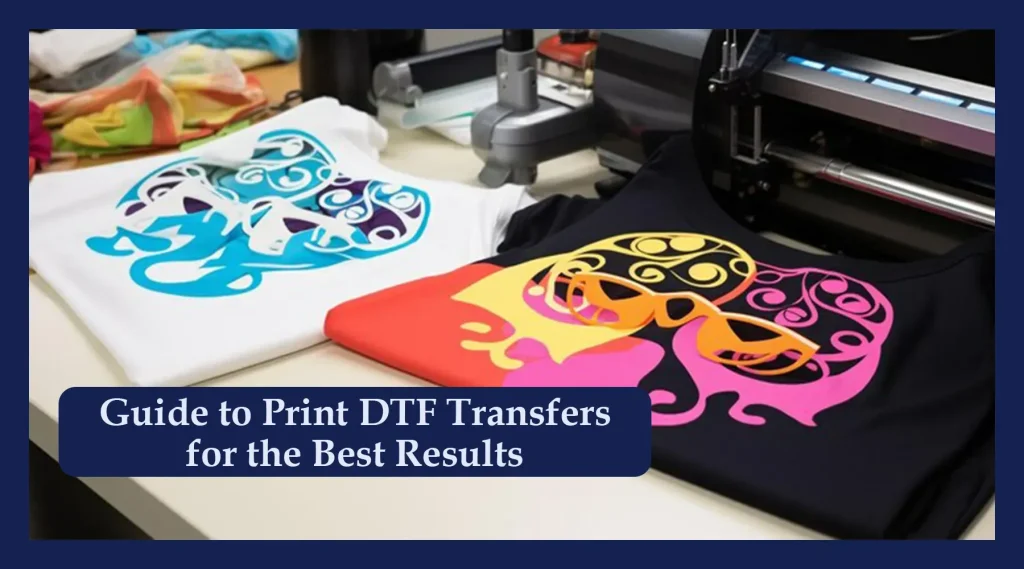
DTF Transfers Demystified: From Artwork to Garment with Direct-to-Film Printing
DTF transfers represent a flexible method for turning intricate artwork into wearable prints using direct-to-film printing. By leveraging a white ink base with CMYK layers, this approach supports vibrant color on a wide range of fabrics and is especially well-suited for short runs and on-demand apparel. Understanding the DTF transfer process helps designers and shops plan color management, substrate compatibility, and workflow efficiency from the outset.
In practice, this starts with strong artwork prepared for film, moving through color separation, printing, powder application, curing, and final transfer to fabric. Emphasizing the end-to-end DTF workflow early ensures that each stage—from design to garment—favors color fidelity, durability, and repeatable results across similar substrates.
Optimizing the DTF Transfer Process: Color Management, RIP Settings, and White Ink Fundamentals
A successful direct-to-film printing run hinges on precise color management. Selecting a RIP workflow that supports ICC profiles, soft-proofing, and accurate color separation helps preserve your intended hues when the design is transferred to fabric. Adjusting ink viscosity, print order, and pass count also influences opacity, especially on dark fabrics where the white base must be robust.
Operationally, optimizing the DTF transfer process means validating print output both on-screen and on actual garments, then fine-tuning brightness, contrast, and saturation. Regular nozzle checks, calibration of the print head, and monitoring of white ink performance under curing conditions all contribute to reliable results and stronger adhesion in the finished transfer.
Artwork Preparation for Direct-to-Film Printing: DPI, Color Separation, and Substrate Considerations
Preparing artwork for DTF transfers begins with high-resolution files—commonly 300–600 DPI—to preserve detail when printed to film. Vector artwork excels for logos and typography, while bitmap images require careful rasterization to maintain sharp edges after transfer. Establishing a color profile that aligns on-screen concepts with garment results is essential for predictable outcomes.
When separating colors for the white base and the color layers, designers should account for how shadows, highlights, and black elements will render on the chosen substrate. Dark fabrics in particular benefit from a strong white base to maximize color pop and legibility, so pre-flighting the artwork with substrate color in mind helps avoid washed-out details during the making of DTF transfers.
DTF Transfer Workflow: Printing, Powder, Curing, and Transfer to Fabric
The core workflow moves through printing the film, applying the adhesive powder, curing, and transferring the design to the garment. Printing onto a transparent PET film with a white base followed by CMYK layers sets the foundation for a durable transfer. Proper film compatibility and accurate registration are essential to minimize misalignment during the subsequent steps of the DTF transfer workflow.
Powder binding, curing, and the final press are critical for a strong bond that withstands washing. Uniform powder application and controlled curing prevent cracking and ensure a smooth transfer to fabric. During the press, choose heat and dwell times suitable for the fabric type, adhesive recommended by the supplier, and your preferred peel method to maximize adhesion and minimize scorching.
Troubleshooting, Quality Control, and Continuous Improvement in DTF Transfers
DTF transfer troubleshooting is a routine part of maintaining consistent output. Common issues like white ink opacity, color misregistration, or edge cracking can often be traced back to inconsistencies in color management, powder coverage, or curing parameters. Systematic checks—such as calibration, cleaning the white ink channels, and verifying RIP profiles—help isolate problems before they affect production runs.
Quality control should be integrated into every stage of the DTF transfer process, from file prep and film printing to final garment finishing. Implementing SOPs, maintaining a log of successful settings for each substrate, and conducting post-wash tests provide a data-driven foundation for continuous improvement. Embracing these practices supports reliable, repeatable results and a more sustainable, efficient production workflow.
Frequently Asked Questions
What is direct-to-film printing and how does it fit into the DTF transfer process?
Direct-to-film printing uses a white ink base and CMYK layers printed onto a PET transfer film, forming the foundation of the DTF transfer process. After printing, the film is coated with adhesive powder, cured, and pressed onto fabric to achieve vibrant, durable designs. By aligning the artwork preparation, color management, and precise heat and time controls, this stage ensures reliable transfers across fabrics.
What are the essential steps in the DTF transfer workflow for making DTF transfers?
The DTF transfer workflow starts with design and artwork prep, then color separation and RIP settings, printing the film, powder application, curing, transfer to fabric, post-press finishing, and quality control. Each step influences opacity, color fidelity, and durability. For making DTF transfers, maintain consistent parameters, document tested settings, and verify results on the target fabric.
What are common DTF transfer troubleshooting tips for issues like misregistration or poor adhesion?
DTF transfer troubleshooting focuses on printer and platen alignment, registration marks, and adhesive bonding. Calibrate the printer, secure accurate heat-press placement, and verify curing times to prevent misregistration or weak adhesion. Clean films and ensure correct white ink density to address opacity or ghosting issues.
How can you improve color fidelity in direct-to-film printing during the DTF transfer process?
Improve color fidelity by using tight color management: ICC profiles, a RIP with soft-proofing, and device calibration. Validate colors on the actual garment with soft-proofing, adjust brightness and contrast, and monitor nozzle health and ink consistency. Optimize substrate color handling and ensure proper curing to preserve color accuracy.
What materials and workflow considerations are essential for successful making DTF transfers and optimizing the DTF transfer workflow?
Key materials include a dedicated DTF printer with white ink, high-quality PET transfer film, reliable adhesive powder, a curing system, and a heat press. Develop and follow a standard operating procedure (SOP) for the full DTF transfer workflow, track substrate data, and continuously test new films or fabrics to refine the process for making DTF transfers.
| Step | Key Focus | Notes | |||||||||||||||||||||||||||
|---|---|---|---|---|---|---|---|---|---|---|---|---|---|---|---|---|---|---|---|---|---|---|---|---|---|---|---|---|---|
| Step 1 | Design & Artwork Preparation | High-resolution artwork (300–600 DPI); vector for logos/typography; rasterize bitmaps carefully; establish color management and a color profile; separate black/white elements and consider substrate color (dark fabrics benefit from a strong white base). } ]},{ | Step 2 | Color Separation & Print Settings | White base + CMYK; careful color separation; RIP settings with ICC profiles and soft-proofing; validate colors on the garment; adjust brightness, contrast, and saturation; consider ink viscosity, print order, and pass count to build opacity on dark fabrics. | Step 3 | Printing the Film | Print onto transparent PET film designed for DTF; white ink base followed by CMYK layers; ensure film type matches printer and adhesive system; monitor nozzle health, color consistency, and banding; cure after printing; store films in a clean environment to prevent smudging. | Step 4 | Powder Binder Application (Adhesive Powder) | Coat film with a fine layer of hot-melt adhesive powder; ensure uniform coverage to avoid cracking or peeling; use automatic powder applicators or manual methods; sift away excess powder gently to prevent lumps; prepare film for curing without transfer of powder to the garment. | Step 5 | Curing the Powdered Film | Cure the adhesive powder to fix it to the film using a dedicated curing unit or a controlled heat source; avoid scorching or distortion of the ink; temperature and time vary by equipment; ensure uniform curing and check film for uniformity after curing. | Step 6 | Transfer to Fabric (Printing on Garment) | Align the cured film on the target garment; secure on a flat surface to prevent shifting; heat-press settings depend on fabric, transfer thickness, and adhesive recommended by the film supplier. Typical: 160–170°C (320–340°F) for 10–20 seconds with firm, even pressure; choice of warm vs hot peel; test samples to find strongest bond without scorching; after pressing, peel away the carrier cleanly and adjust if edges lift. | Step 7 | Post-Press Finishing & Quality Control | Allow the garment to cool briefly, then perform a cold or warm peel as appropriate; inspect color accuracy, edge sharpness, and defects (white haloing, color bleed, misregistration); conduct quick wash tests to gauge durability and colorfastness; ensure white base provides sufficient opacity on dark fabrics and that the transfer remains secure after washing. | Step 8 | Troubleshooting Common Issues | Address white ink opacity, color misregistration, cracking/peeling, hazy/ghosting, and adhesion problems with practical fixes: adjust white ink density and cleaning, calibrate printer/platen alignment, use registration marks, balance powder coverage and curing, and consider fabric pre-treatment or testing different fabric blends. | Step 9 | Equipment, Materials, & Workflow Optimization | Ensure essential equipment: DTF printer with white ink capability, PET transfer film, adhesive powder, curing system, heat press, and a clean, aligned work area; develop SOPs; track job data (substrate, fabric color, press times, cure temps); monitor yield, identify bottlenecks, and refine formulas for consistency. | Step 10 | Sustainability, Safety, and Best Practices | Mindful handling of inks, powders, and solvents; ensure proper ventilation and SDS compliance; recycle or dispose of waste responsibly; maintain cleanliness to reduce defects; conduct small trials, keep a settings log, and train staff for consistent handling; documentation supports quality as staffing changes. |
| DTF transfers | DTF Transforms Production | DTF transfers are a flexible method for apparel decoration that combine white ink base with CMYK to produce vibrant results on various fabrics, offering advantages for short runs and on-demand production. | |||||||||||||||||||||||||||
| DTF transfers in Context: Why This Method Stands Out | DTF transfers enable vibrant colors and durability on dark fabrics, with flexibility across fabrics and smaller runs; relative to DTG and screen printing, it can be more forgiving for complex details and have easier setup for on-demand production. | ||||||||||||||||||||||||||||
| Conclusion | The step-by-step DTF transfers production process—from design and artwork preparation to the final garment finish—is a well-orchestrated sequence of tasks. When each stage is executed with careful color management, material compatibility, precise heat and time controls, and thorough quality checks, you can achieve durable, vibrant transfers that look as good as the artwork intended. By embracing a robust workflow, you can reduce waste, increase output consistency, and deliver high-quality garments that resist washing and wear. Whether refining an existing DTF transfer process or starting a new venture, the key is to test, document, and optimize. With the right combination of design discipline, equipment, and best practices, DTF transfers can elevate your apparel line with reliable, repeatable results. | ||||||||||||||||||||||||||||
| DTF transfers | First Sentence with SEO Focus | DTF transfers offer a robust, flexible approach to apparel decoration, combining white ink bases with CMYK to deliver vibrant, durable results across fabrics. This guide highlights the step-by-step process—design, color management, material selection, and quality control—that makes DTF transfers suitable for short runs, on-demand production, and diverse garment types. | |||||||||||||||||||||||||||
| End |
Summary
DTF transfers offer a robust, flexible path for apparel customization, and the step-by-step process described here—from design and artwork preparation to the final garment finish—demonstrates how careful color management, material compatibility, precise heat and time controls, and thorough quality checks drive durable, vibrant results. By embracing a well-documented workflow, you can reduce waste, improve production consistency, and deliver high-quality garments that resist washing and wear. Whether refining an existing DTF transfer process or starting a new venture, testing, documenting, and optimizing are essential to achieving repeatable, reliable results with DTF transfers.