DTF transfer troubleshooting is essential for getting durable, vibrant designs on garments and textiles. This practical guide helps you diagnose issues quickly, from misalignment to color shifts. By checking ink quality, film handling, and heat press settings, you can prevent DTF printing issues before they derail a project. We cover DTF ink troubleshooting and transfer alignment tips to streamline your workflow. Follow a repeatable troubleshooting process to reduce waste, speed results, and deliver consistent, wash-fast finishes.
From a broader direct-to-film workflow perspective, the aim is dependable adhesion and vibrant imagery powered by thorough diagnostics. Think of the DTF process as a system where ink, film, powder, and heat must cooperate, with each variable tuned for the substrate. Common printing challenges can be reframed as DTF process issues and alignment concerns that benefit from a repeatable inspection routine. By focusing on color fidelity, material handling, and press calibration, you create a resilient workflow that scales from a single item to batches. In short, mastering these diagnostics empowers you to predict outcomes, minimize waste, and deliver consistent, durable results.
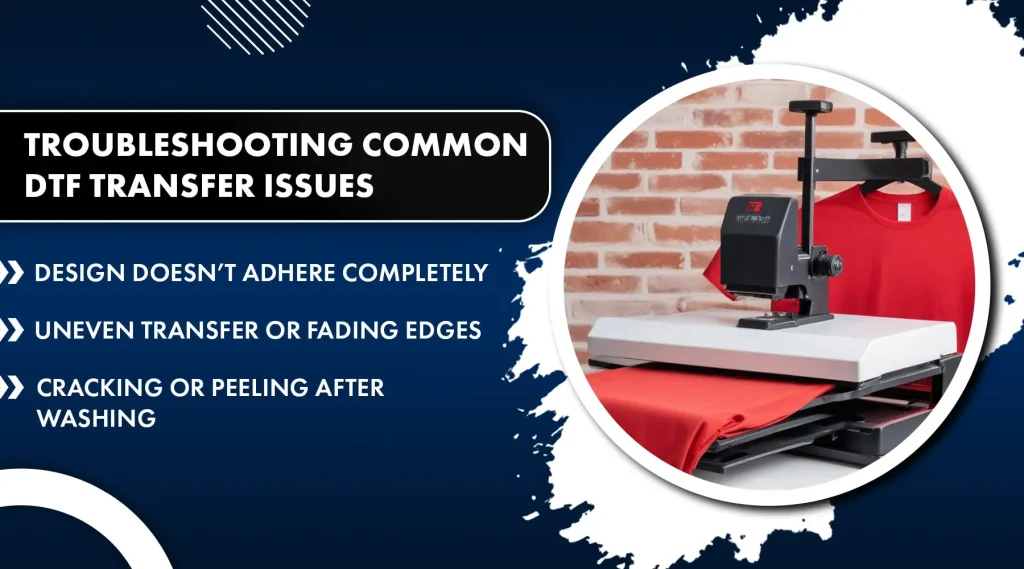
DTF transfer troubleshooting: A Practical Diagnostic Workflow
DTF transfer troubleshooting is most effective when you follow a repeatable diagnostic workflow. By framing issues around the printer/ink, film and powder, heat press parameters, and the fabric or substrate, you can quickly narrow down the root causes behind DTF transfer problems. This approach keeps you focused on actionable variables rather than guessing, reducing waste and downtime while improving consistency across orders.
Begin with a quick, repeatable test plan: verify you’re using the correct film, adhesive powder, and transfer size; confirm temperature, time, and pressure align with the manufacturer’s guidance; check the print for color consistency and sharp edges; inspect the powder application and curing; and finally ensure the garment is clean, dry, and properly aligned. By testing one variable at a time, you can isolate whether the issue stems from ink quality, film handling, powder curing, or heat pressing, enabling faster and more reliable fixes.
Understanding and addressing common DTF transfer problems
DTF transfer problems commonly surface as misalignment, color shifts, whitening, or ghosting. These symptoms often point to a mismatch between the print and the transfer process, or to issues in printing quality such as ink density or nozzle health. Framing these as DTF transfer problems helps you differentiate whether the root cause lies with DTF printing issues or with the transfer stage itself.
Addressing these concerns starts with checking alignment and placement, then reviewing heat press settings and substrate prep. If colors appear dull or misregistered, revisit ink management, ICC profiles, and curing times. By aligning your diagnostic steps with typical trouble areas—ink, film/powder, and heat application—you can implement targeted fixes that restore vibrancy and durability without overhauling your entire workflow.
Mastering DTF heat press settings for durable transfers
DTF heat press settings are a frequent source of failure when temperature, time, or pressure are off. Establishing correct parameters helps ensure complete adhesion, avoids scorching, and minimizes color bleed. Understanding the impact of each variable on the film and fabric lets you tailor a robust process that consistently yields durable transfers.
Key guidance includes maintaining a temperature range around 180–190°C (356–374°F) as a baseline, with adjustments based on fabric type. Typical dwell times span 12–15 seconds, and steady, even pressure is essential. Don’t skip pre-press steps to remove moisture and wrinkles, and follow proper post-press handling and peeling guidance to avoid transfer distortion or edge separation.
DTF ink troubleshooting for vibrant, wash-fast prints
DTF ink troubleshooting focuses on maintaining print head health, accurate color reproduction, and proper curing to achieve wash-fast results. Poor print quality often stems from clogged nozzles, aging inks, or mismatched color profiles, which can lead to color shifting and uneven density during the DTF transfer process.
Practical steps include running nozzle checks, performing head cleaning as needed, recalibrating color profiles, and confirming ink film thickness is appropriate for the media. Use fresh, compatible inks and verify the printing workflow with color targets and ICC profiles to ensure that colors render accurately on your chosen garment material.
DTF transfer alignment tips for consistent multi-item runs
DTF transfer alignment tips help prevent misregistration whether you’re decorating a single garment or running a batch. Stability during layout and pressing, reference marks, and alignment jigs reduce variability across items and enable faster production without sacrificing accuracy.
Practical alignment practices include using a stable surface, a garment board, and light clamps to minimize shifting, as well as employing a pressing pillow for textured fabrics. By standardizing reference points and using protective sheets to manage heat distribution, you can achieve consistent placement and edge-to-edge alignment across multiple items, improving overall workflow efficiency and customer satisfaction.
Frequently Asked Questions
DTF transfer troubleshooting: what are the initial steps to diagnose common DTF transfer problems during a project?
Start with a quick, repeatable workflow: confirm you are using the correct film, adhesive powder, and transfer size and follow the manufacturer’s temperature, time, and pressure guidelines; inspect the print for color and edge defects to determine if the issue is printer/ink related; examine the powder layer for even application and proper curing; verify garment prep and alignment with a pre-press; finally run a small test and adjust one variable at a time (temperature, pressure, or dwell time) to isolate the cause.
DTF printing issues: how can DTF transfer troubleshooting help prevent color shifts, dull colors, or misregistration?
Use a focused diagnostic routine: perform a nozzle check and clean the print heads if streaks or gaps appear; recalibrate color profiles to match the printer, ink, and garment; ensure you are using fresh, compatible inks and appropriate ink film thickness; print a small color target and compare against your ICC profile to guide adjustments; verify underbase and curing steps to improve color fidelity before final presses.
DTF heat press settings: what DTF transfer troubleshooting tips optimize temperature, time, and pressure to avoid peeling or scorching?
Tune the heat press parameters for the film and fabric: typical temperatures are around 180-190 C with dwell times of 12-15 seconds; apply firm, even pressure using a pillow or silicone sheet for uniform contact; include a short pre-press (2-5 seconds) to remove moisture and reduce wrinkles; after pressing, follow film guidelines for warm or cool peeling and allow cooling before removing the liner if required.
DTF ink troubleshooting: how does DTF transfer troubleshooting address ink-related printing quality issues like clogging, color shifts, or fading?
Prioritize ink- and print-related checks: run a nozzle check and clean print heads if lines are missing or streaked; recalibrate color management and ICC profiles to match the garment substrate; ensure ink age and compatibility, and verify the film’s compatibility with your ink; print a color ladder to verify color accuracy and adjust as needed; ensure proper curing to prevent color washout or bleeding.
DTF transfer alignment tips: what practical alignment tips does DTF transfer troubleshooting recommend to prevent misregistration across garments?
Use a stable work surface and garment board, apply reference marks or an alignment jig, and use clamps or hinges to prevent shifting as you close the press; for textured fabrics, employ a pressing pillow to even contact; consider a cover sheet or Teflon sheet for heat distribution; run a test print to verify alignment, and keep notes on garment type and placement for repeatability.
| Topic | Key Points | Practical Actions |
|---|---|---|
| Root Causes | Ink & print quality; Film & powder handling; Alignment & placement; Heat press parameters; Garment & surface prep | Assess each area; optimize printer ink, film/powder, press settings, and prep to improve consistency and adhesion. |
| Diagnosing Fast Plan | Quick, repeatable workflow: basics check, print inspection, powder check, garment prep, test and adjust | Follow the five-step plan; run simple tests and isolate one variable at a time to identify root causes. |
| Quick Fixes for Common Issues | Dull colors; color bleeding; ghosting; rough texture; white specks | Ink: nozzle check/clean heads; recalibrate color profiles; ensure fresh inks; proper ink film thickness |
| Heat Press Settings & Timing | Temp ~180–190°C; time 12–15s; even pressure; pre-press; post-press handling | Follow film/fabric guidelines; run test passes; adjust temp/pressure/time to achieve complete adhesion without scorching. |
| Alignment & Surface Considerations | Stable work surface; clamps; alignment marks; texture handling with pillows; protective sheets | Use alignment jigs; ensure flat contact; counteract fabric texture; protect surfaces with sheets. |
| Surface & Adhesion Best Practices | Fabric variety; pre-treatment; adhesive powder handling; curing; cooling/removal | Test on scraps; follow film guidelines; ensure complete curing; peel per product specs. |
| Troubleshooting Checklist | Matched film/ink/powder; nozzle check; color target; pre-press; correct temp/time/pressure; alignment; peel method | Keep a quick-reference checklist; adjust one variable at a time; maintain documentation. |
| Maintenance, Prevention & Continuous Improvement | Printer maintenance; film/powder lifecycle; QC routines; data-driven adjustments | Implement ongoing routines; track results; clean and calibrate regularly; update workflows. |
Summary
Conclusion: DTF transfer troubleshooting is a repeatable, process-driven approach that integrates print quality, transfer technique, and substrate considerations. By methodically checking ink, film, powder, heat settings, and alignment, you can quickly identify root causes and apply effective fixes, reducing waste and downtime while delivering consistent, wash-fast results. Build a simple QC routine and test on scraps before full runs to reinforce reliability and optimize outcomes for your customers or personal projects.